JUN 23
If there’s one thing we love around the office, it’s new gadgets. Even better is one of these new gadgets is an update to one of our favorite cameras. A few years ago we introduced the
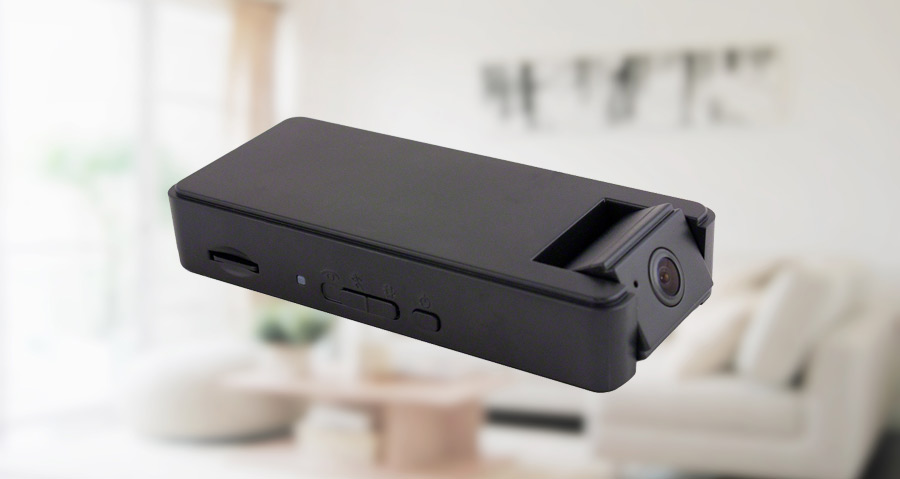
Mini Black Box Hidden Camera, and it has consistently been one of our top sellers. Now we’re excited to introduce the new model, the 720P HD Mini Black Box Hidden Camera with Wide Angle Lens and Long Life Battery:
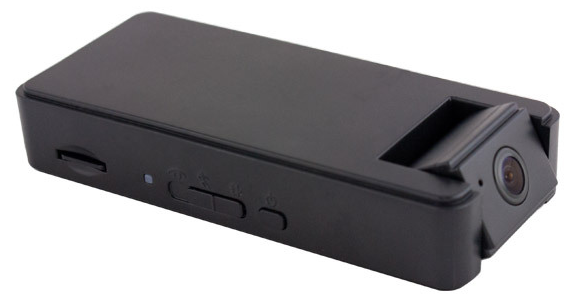
This hidden camera is tiny – 4″ long by 1.5″ wide and less than an inch tall. Its small size allows it to be hidden almost anywhere – you can hide it on a shelf, behind some magazines or books, or even inside an ordinary object like a tissue box. Just like our regular black box camera, the possibilities for placement are endless!
New Product Features:
- 720P HD Color Recording – Record clear color HD video
- Long Life Battery – Get up to 8-10 hours on a full battery charge
- Dual Power – Camera can record while plugged in to AC power
- PC and Mac Compatible – Watch recorded videos on any computer
- Wide Angle Lens – Amazing 160 degree lens never misses a thing
- Adjustable Lens – Tilt the camera so you always get the best view
Popular Uses:
- Use as a nanny camera to monitor your babysitter or nanny
- Leave it in your car to provide vehicle security monitoring
- Place the camera in your office to provide business security
- Utilize the camera for home security to monitor your house
- Even use it to monitor your pets when you aren’t home
Camera Setup and Operation:
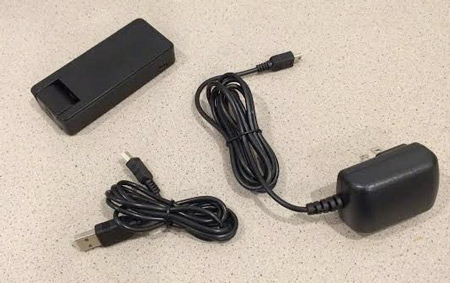
When you receive the camera, you’ll find the following items in the box: the camera itself, a USB connection cable, an AC wall charger, and a quick start guide:
The first thing you’ll need to do is to get a micro SD memory card (anywhere between 4GB and 64GB capacity card). The larger the memory card, the more video files it can hold, and the less often you’ll need to delete files as the card fills up.
If you get a 64GB card, you’ll need to format the card with the
HPUSBDisk formatter so that the camera will recognize the card.
Once you’ve inserted the card, connect the camera to a wall outlet using the included AC charger. While the device is charging, the LED will glow solid orange. When the camera is fully charged, the LED will change from solid orange to solid green.
Customizing the Recording Modes
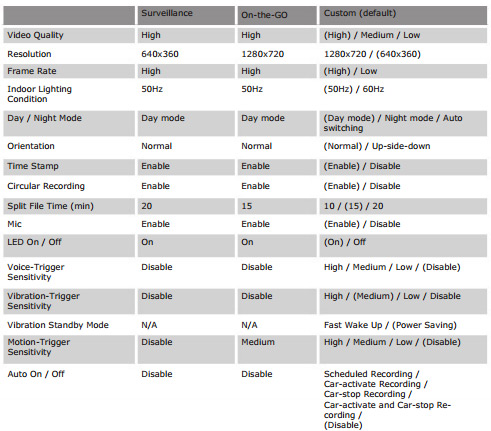
The HD Black Box Hidden Camera features 2 different preset recording modes, as well as a “Custom” recording mode, which allows you to adjust over a dozen different settings. To selet the recording mode, slide the mode switch on the side of the camera to one of the 3 possible positions:
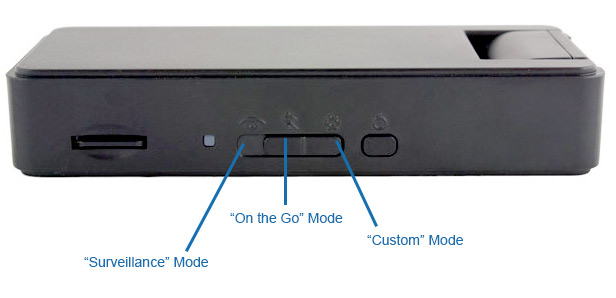
The “Surveillance” Mode and “On the Go” Mode have their own pre-sets, and the custom mode allows you to adjust each of the settings individually. The chart below shows the settings for each pre-set mode, as well as the options that you can customize:
Adjusting “Custom” Mode Settings:
If you want complete control over your recordings, we recommend using “Custom” mode on the camera. The first step in doing this is to move the mode switch all the way to the right to “Custom” mode (looks like a gear icon).
Once you’ve put the device into Custom mode, make sure that you’ve inserted a memory card into the camera, and connect the camera to your computer.
Next, download the DVR Widget, and double click to run it.
After you’ve opened it, click the “Option” button, and then on the Setting Mode drop down menu, select “Custom Mode”, and then click the “Save Option” button:

Once you’ve clicked the “Save option” button to set the device to use the custom settings, click the settings button on the left side of the widget, and you’ll be presented with several different settings to adjust:
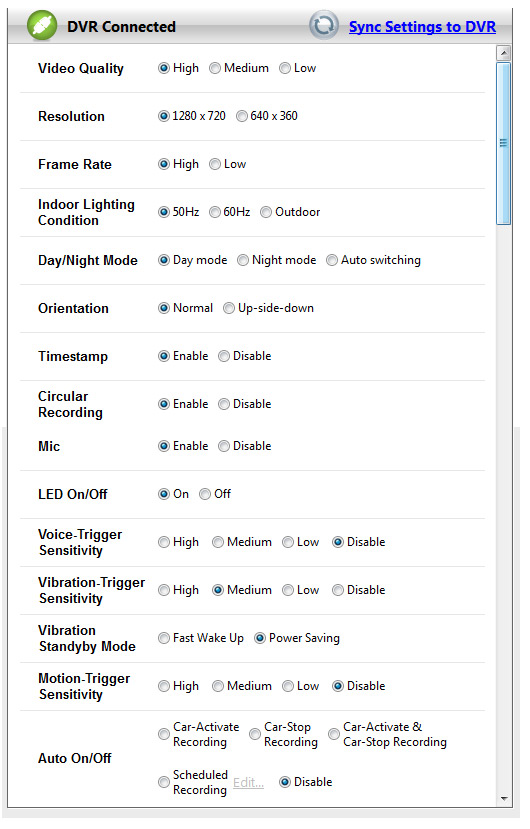
Below is a quick description of each setting:
Video Quality – Choose your desired video quality setting
Resolution – Choose either 720P HD or 640×360 high resolution
Frame Rate – Higher frame rate means smoother playback
Indoor Lighting Condition – Adjustable depending on the amount of light in the room
Day/Night Mode – Allows you to adjust the camera if it will be used in different lighting conditions
Orientation – If you’re going to place the camera upside down, you can switch the video orientation here
Timestamp – Turn on or off the time stamp displayed on the video
Circular Recording – Also known as “auto overwrite mode”, this is whether or not the camera will overwrite the oldest video files if the memory card fills up.
Split File Time – When the camera is recording for long periods of time, you can choose how many minutes each file will be split up
Mic – Whether or not the microphone is enabled for recording
LED On/Off – Turns the LED on the side of the camera either on or off. You can turn it off for maximum covert operation.
Voice-Trigger Sensitivity – If you want the camera to record in “voice activation mode”, you can set this to Low/Med/High sensitivity. If not, you can leave this option disabled.
Vibration Trigger Sensitivity – If you want the camera to record whenever movement is detected, you can choose Low/Med/High sensitivity, otherwise, you can mark this option disabled.
Motion Trigger Sensitivity – If you want to record in motion activated recording mode (this option is most popular), you can adjust the sensitivity to Low/Med/High, or you can set it to Disable if you don’t want it to record when there is motion.
Auto On/Off – You can use this option to set up Scheduled Recordings, so that the camera will only record at certain times of the day depending on the trigger you select.
Once you’ve finishing adjusting the settings and getting them just how you like, click the “Sync Settings to DVR” and you’re all ready to record.
To turn the camera on, press the power button on the side of the camera. If you’ve left the LED enabled, you’ll see the green light start to flash, which means the camera is recording. When you’re done recording, simply press the power button again to save the current video and turn the device off.
Playing Recorded Video Files
When you’re ready to view your recorded video files, you can do so a couple different ways. The easiest way is to make sure the camera is powered off, and connect the camera to your computer using the included USB cable. A removable drive will pop up (or you can navigate to your My Computer to find the removable drive). Click on the DVR folder, and then you’ll see a list of video files:
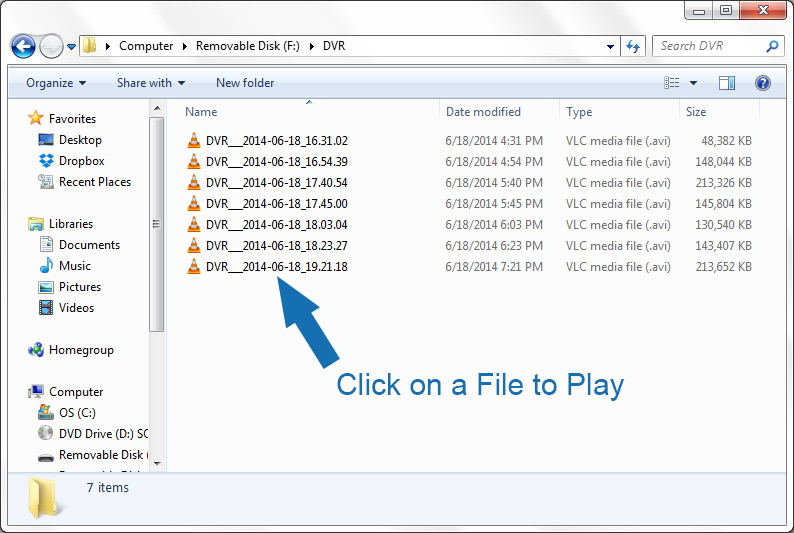
The video files should play in any media player, but if you have any problems, we always recommend using
VLC Media Player, a free video player for both PC and Mac computers.
Summary
That’s it! An in depth view of our
720P HD Mini Black Box Hidden Camera, which is soon to be one of the most popular hidden cameras that we offer. It’s available to ship now, and is only $125.00. If you have any questions pre or post sale, please contact us and we’ll be glad to answer any questions you have!


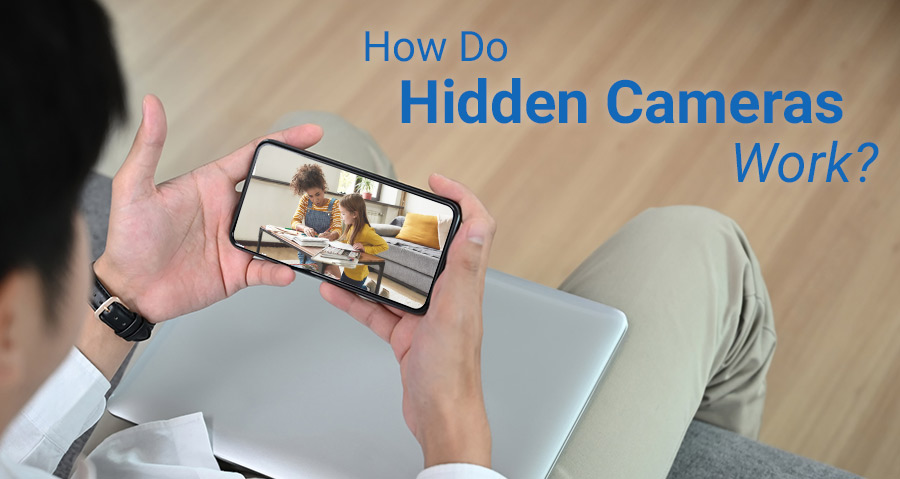 How do Hidden Cameras Work?